
CHAPTER
SEVEN
Resources that Engage
Now that you understand how a collection of activities work online, you can enhance them with multimedia resources and supplementary materials.
7.1
Text-based Supplemental Resources
How to Embed Text Examples
In many cases, you can simply copy the text from the web and then paste it into your course. If this is not possible, check your LMS for instructions.
7.2
Images – Photos, Screenshots, Charts, Graphs, and Illustrations
Search for Openly Licensed Images
Google -> Settings -> Advanced Search -> Usage Rights
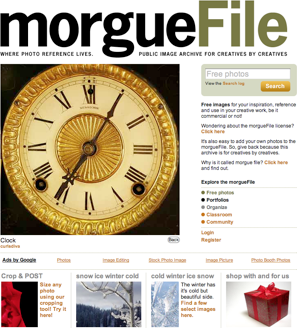
The web can be a wonderful source of images. And while there is a wealth of sites where one can find usable, copyright-free images, the most popular is probably morgueFile. morgueFile is another good, hassle-free site for getting images. Don’t be put off by the curious name. Unlike flickr, which has levels of permission-free and permission-needed images, morgueFile is happy to have you se anything on the site, no permission needed. Just search, find an image and put it in your course.
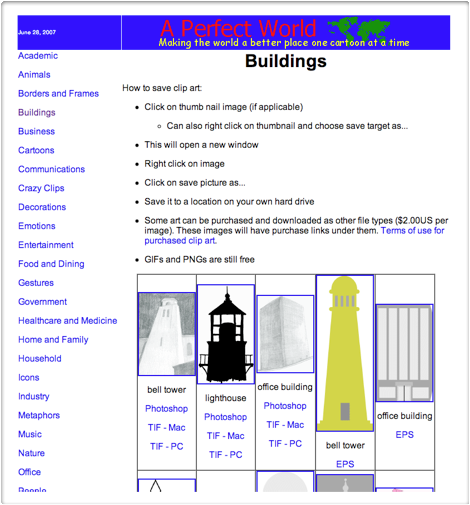
A Perfect World is one of many sites where you can find free graphic images. This site is particularly easy to use. Many sites that offer free images are overly complicated because they really want to lead you to images that cost money in the end. When you find an easy to use site be sure to bookmark it. Notice the screen below from A Perfect World. The instructions are easy to follow and the images are clearly marked.
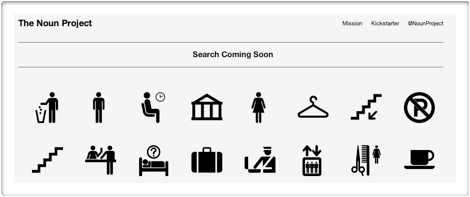
The Noun Project is a good site for finding universally understood, simplified images.
Screenshots
The Noun Project image above was taken as a screenshot using Grab, a program on the Mac. Screenshot programs are easy to use and easily available. Once you indicate that you want to shoot a screenshot, you frame the image on your computer screen. When you finish a shot is taken that you can save an use in your course.
7.3
Audio and Video
Audio
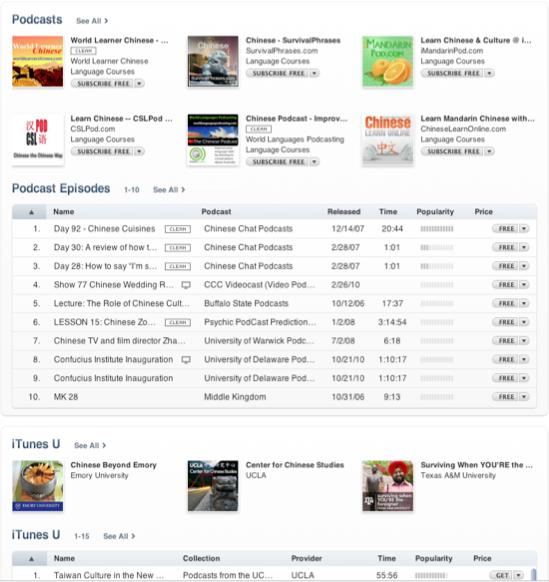
Podcasts are the most common types of ready-made audios that can be accessed without charge. The widest and most easily-available podcasts can be found through Apple’s iTunes program. Even though podcasts are free you get them through the iTunes store. iTunes comes with Macs and be downloaded for PCs from apple.com. Below is a sample selection of podcasts that come up when you search under Chinese Culture podcasts in iTunes.
Video
YouTube and Vimeo are the most popular video access sites. With YouTube and Vimeo, if it’s there, it can be embedded or linked within your online course. You can access a wider range of videos by simply searching for the topic on your web browser and including the word video in the search statement. Try searching for something, say “electric cars,” in YouTube and Vimeo first. Then search “videos electric cars,” or whatever topic you want, in your browser. Doing this a few times will give you a sense of what type of searching is best for you.
DIY
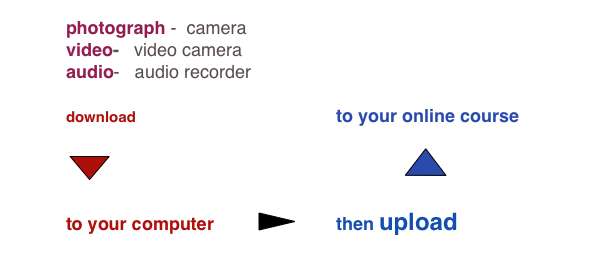
On the simplest and most basic level here is the process for getting custom-made media to your class:
Creating Images – Scanning
Many printers have built in scanners. If you have one you can use it to scan in photos, drawings, or print images that can be used in your online course. Scott Thornbury did the drawing below then scanned it for one of his online courses. The hand drawn quality is a nice break from type and slick images.
Images
In the sample toolbar below the “upload image button” is outlined in red. Indicate where you want the image to appear in your course (usually with cursor placement). Then click on the “upload image button.” At this point you will be able to browse your files for the image, click on the file and it will be inserted into the course. You can also cut an image from a document and paste it where you want it in the course.

Photographs
Digital photography has made taking photos a snap! Owning a digital camera is so common that we won’t bother to talk about any particular brand. A good rule is, if you don’t have one, buy the simplest one you can find.
Many of you will be familiar with how to take digital photos with a camera (or a smart phone with a camera option) and download these photos to a computer. Here are the basic steps.
1. Take photos.
2. Connect the camera or smartphone to your computer. A cord with one end that plugs into the camera and the other that plugs into a USB outlet on the computer, usually comes with the camera when you buy it. Or you may be able to connect wirelessly.
3. Download the photos to an image program in the computer. If you own a Mac, use the iPhoto program that comes with it. Photo Gallery is the program that comes with Windows. You can also use the program that comes with the camera. If the photos are not in .jpg format, save them as .jpg.
4. Note the specific filenames and location of each image you want to use for your course. Filenames should reflect the placement of the file and describe it (see note).
Note: Here is the problem – Sizing your image so that they are the correct size is tricky. You will need tech help for this. If the file size is too big, it can take a long time to open or be too big for the page.
Audio
Audio recording can be done with a basic voice recorder. There is no one recorder that stands out the way the Flip does for video. Just get the least expensive and simplest to use. Some mobile devices like smartphones, the iPod touch or iPad can be used for audio recording as well. As with video, you can also use your Mac or PC to record as well. You will need a mike if your PC doesn’t come with one that is built-in. All Macs have built in mikes.
The procedure is similar to the procedure for video. As with video, you can edit audio to keep it short and to the point. Make sure that the audio is saved as a MP3 file, note its filename and location.
Videos
A simple way to record yourself, say, to do part of a lecture, a reading, tell a story, etc., is by simply using your computer. Macs and some PCs come out of the box ready to record. In these cases, the microphone and video camera are built in. You can set up a PC with an external video camera if it does not come with one.
If you are using a mobile phone or more video camera, download the file to whatever program you use for video files. iMovie comes with the Mac. Live Movie Maker comes with Windows. The process for using these is beyond the scope of this guide. Instructions should be in the program’s documentation.
Upload the audio or video to the specific place you want it to appear in the course. The student may see an icon on the screen that they click on to access the audio or video. Or you can crate image or word links to the audio or video that the student clicks on to listen or view.
In your LMS choose the specific spot in the course where you want the audio or video. Click on the button to indicate that you want to upload an audio or video. When you click on it you will be able to browse your files, find the video you wish to add, then upload it.
In the sample LMS toolbar below, YouTube is used for uploading both audios and videos. There may be two separate buttons for audio and video in other LMSs.

In the sample LMS toolbar above, the YouTube icon for uploading images is outlined in red. In this LMS you must connect to YouTube to upload a video. Watch the video below to see how you do this. In any LMS you can have a student access a video through a link just as we have done here with this link. Be aware that once you post a video on YouTube or Vimeo anyone, anywhere can access it.
Note: Here is the problem – Again file size is an issue here. Also the programs you use to create and manage audios and videos are more complicated than they are for images. Your best bet is uploading your audio and video files to YouTube or Vimeo and then linking to them.
7.4
Varying Voices and Perspectives
For audio referred to in the book, see 7.5 below.
7.5
Experiences from the Field
7.6
Free Web-based Tools
7.7
Accessibility